Now, our family makes more of a cake ball, and we've never felt the need to put sticks inside; instead we prefer to eat them by the handful before the chocolate shell melts on our fingers. The stick element would be a new challenge for me, but I was confident I would figure it out easily.
I was able to get the cake mix and frosting on sale (strawberry is not always the easiest flavor to find!) and I bought three pounds of melting chocolate from Appletree Lane, which has the BEST chocolate hands down for candy making. Visit them here.
I also bought the 50-ct. Wilton sticks using a 40% off coupon at Michaels so that was a bargain too.
I was SO happy I thought to re-read the family recipe prior to being gone for part of the day--there are several steps that take a long time to complete! I started that morning with baking each cake (I made two) by following the box directions exactly.
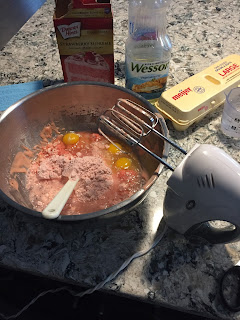
While the cake was still warm, I crumbled it up into a large bowl, and then added the can of frosting and mixed well. It looks like dough at this point.
The dough has to be refrigerated at least three hours or even overnight. We were going to be gone for several hours so I knew that would be long enough.
Once we were home again, I balled up the cake ball 'dough'. I'm sure a melon-baller would've made this easier but instead I used a large spoon and my hands (tip: REMOVE YOUR RINGS!).
Critical step: cake balls must be frozen to retain their shape when dipped.
Critical error: putting the sticks into the balls before freezing. I am quite sure this was a big downfall of my vision of the "perfect treats".
Once frozen, I attempted to melt the chocolate (best tip: microwave a pile of the chocolates for 30 seconds, then stir, then 30 more seconds, and it will be perfect with just a few pieces of solid chocolate that will quickly melt when stirred again) and then dip each ball on a stick,
This is where I got mega-frustrated, to the point that I am pretty sure I yelled, "Don't ever expect me to make these again!!!". The sticks were falling out. The balls were spinning on the stick and not picking up the chocolate evenly. The balls would fall into the chocolate. I also spent $3 on what I thought would be a cool Wilton cake pop stand but that was a fail too. The balls would bump each other, or the base, when I tried to stand them up to dry in it. I ended up using it just to get them to dry, and then I laid them out in a Tupperware container to transport them to school.
 |
| Ugly little things, aren't they?!!? |
Next year around the beginning of February, you'll find me at the grocery store bakery buying ready-made cupcakes. I'll leave the cake ball making to my stepmom, who clearly is far better at this than I am!! Here is her recipe, better explained than I did above:


No comments:
Post a Comment